Small spring end against ball!
Check Valves
Small spring end against ball!
H2Rtuner wrote:
Stock relief pressures should be between 4.5 and 4.6 psi, most relieve down at 2.2 to 2.4 psi, and need to be adjusted.
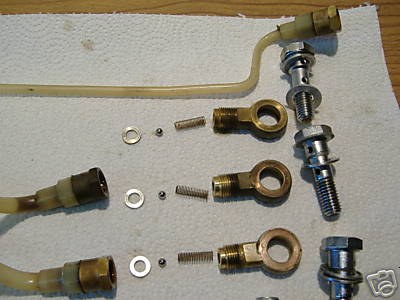
I made a fitting to check the pressure relief, took an
oil pump end hose banjo bolt, two aluminum washers and a nut, installed same in
each line, one at a time, and connected my pressure tester.
I evacuate the line of oil, then hold the valve end near my ear, so I can hear
the air pressure relieve when the valve opens. reading the pressure when the
"air" changes gives the relief rate.
To adjust, unscrew the valve parts, remove the spring and GENTLY pull it apart,
A VERY LITTLE AT A TIME, put the valve back together and retest, stretch, test
until the correct relief pressure is attained, tighten the valve, go to the next
one.
Edit: I cannot stress enough to go very slow and gentle in stretching the
spring, it is very touchy and small, and can be super easy to damage/destroy.
Edit: I set the blowoff pressure to 4.6 psi, that way, I figure the spring will
sack back to 4.3/4.2 psi when it gets happy once again. When rechecked after
being run a few thousand miles, the spec of 4.3/4.2 comes in steady.
Using a hose and oil can filled with two stroke oil, connect the oil pump end of
the line with the pressure check bolt in place, and GENTLY fill the line, return
it to the bike, bleed and go. Stops down the time to fill the whole line from
the oil pump, and you won't need to use premix to bleed the pump/lines.
My Bridgestones all have valves that have hose bibs and use rubber hose between
the pump and valve. I will look, as I think there may be more bikes that use
that type of valve setup, like a few Suzukis and Yamahas of the past. Most
Suzukis used a hard line plastic line like our stuff has.
There may be fittings available in generic form for the oil pump end from
companies like McMaster-Carr, which has a web site, don't remember the address
right off. 6mm bolt hole will relate to 1/4th inch (.250) in non-metric sizing.
I'll have to go with the rubber hose when I case reed my next engine, as the oil
injection inlet will be in the front of the cases, with the reeds.
I just looked in the McMaster-Carr book, no banjo
fittings for the oil pump ends. No check valves either.
May have to look into the hydraulics industry for these parts. I'm working on
it.
On check valves rated at 7.0 psi, not easy to change the spring rates downward
in them, as the first thought would be to simply cut coils off to get the right
rate. Not easy because when a spring is shortened by cutting, its rate goes UP,
not down, as it has less spring materials (coils) to compress.
On other boards I visit, lots of people cut their coil springs for their cars,
half coil, full coil, then are just amazed the suspension gets stiffer from the
cut.
OK, speculate all you want, Kawasaki specifies 4.6 psi
blowoff pressure.
Since there is a metering orifice in BOTH the bottom of the banjo bolt, for the
crank, and in the oil passage in the inlet port, the reversion pressure is
dampened, so the differential backwards doesn't adversely affect the check
valve. Lower end vacuum/pressures are at the 1.50 to 1.75 psi range, lower than
the check valve blowoff pressures.
I have checked new valves out of stock at KMC, Santa Ana, when it was still
there, and got between 2.0 and 2.9 psi.
We got in trouble one time for blowing the check ball all the way through the
spring to the other end of the valve on F series valves from the 125 psi
pressures from the air hoses we used to break 'em, Japan didn't think it was
funny, and that is where the Kawasaki failure code "OU812" came from.
Late ('74 on) Check Valve Removal
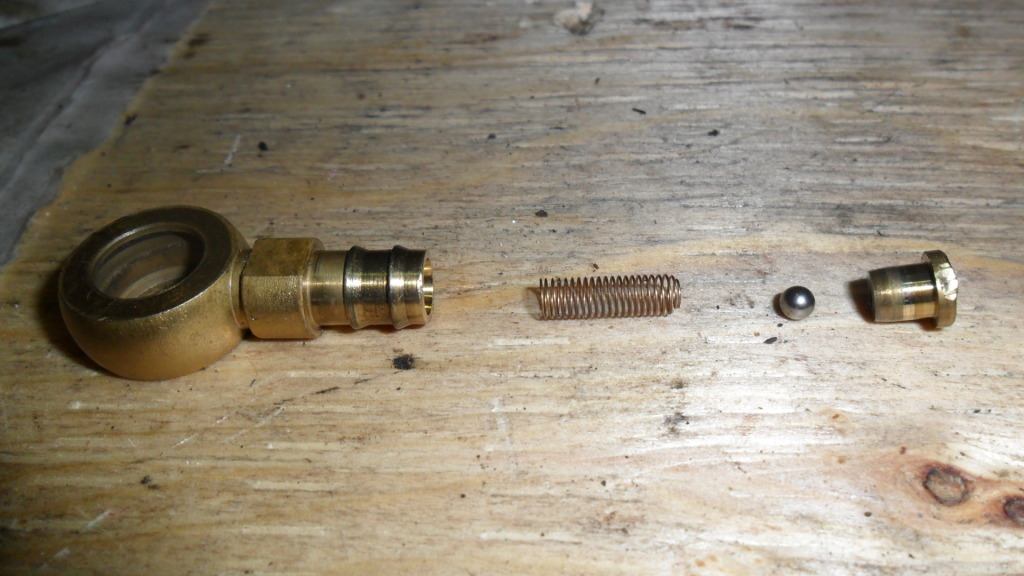
H2Dude wrote:
We know the early check valves can be cleaned when faulty BUT later ones can't or can they. I had a look to see how kawi put these together and viola they do come apart. you have to be very gentle on the little brass plug. BE careful as to not loose the ball when removing brass insert!!
I put the check valve in a vice and with pliers I remove the
metal guard then using a hot air gun I gently start to heat the line while
gently pulling ..Not the small line.
Be ready it will pop off. When putting back on , gently heat the line and
push it back on.
I only broke one trying to pull the line off without heating it first on my test
line that was screwed.
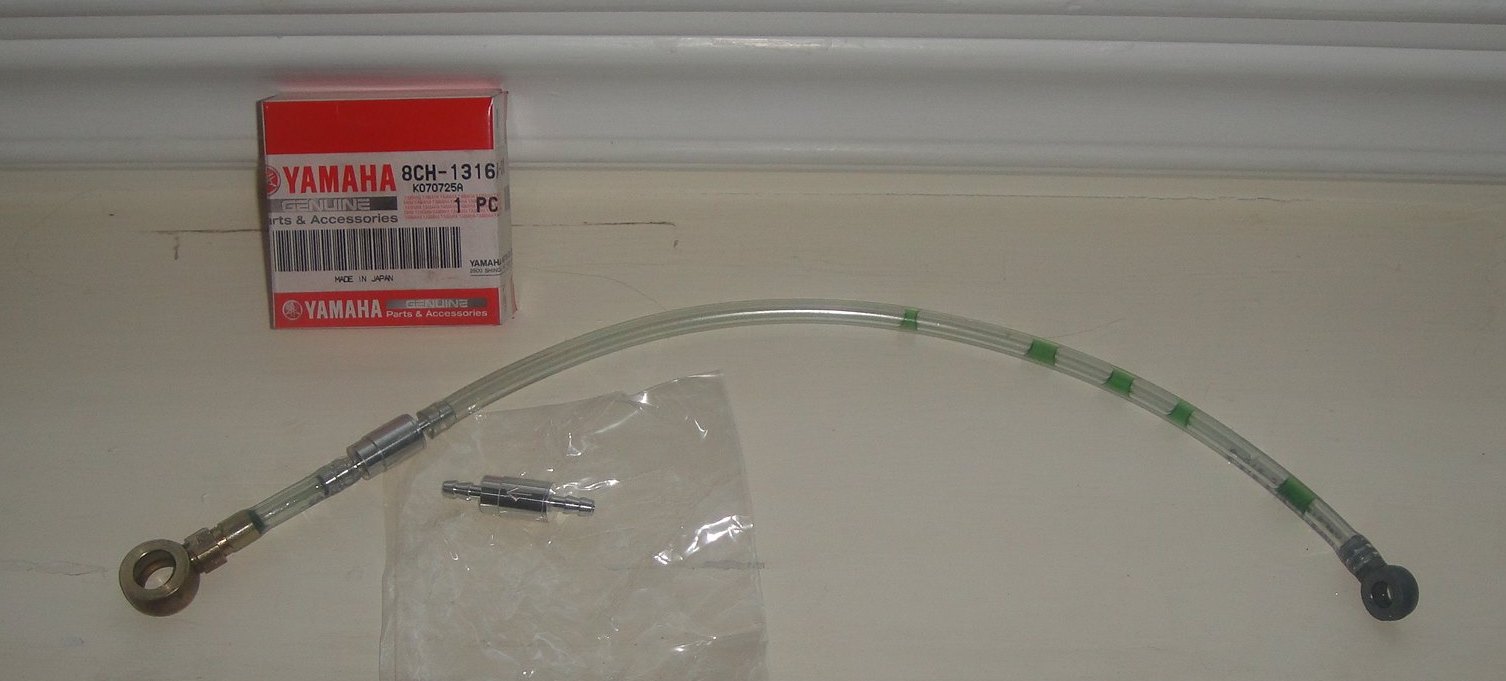
Here is an alternative check valve used on many
Yamahas...
Yamaha pn# 8CH-1316A-00-00. Crack pressure has been measured at 2-5 psi.
Also see: Check Valve Test